Free Shipping on Orders Over $100
The Full Guide to Installing a Backup Camera on Your Truck
Updated on Mar 31, 2025

Backup cameras are a useful addition to any pickup. These innovative cameras enhance visibility while hitching up to a trailer, navigating a tight parking lot, or reversing down a long, windy driveway. Many truck owners are surprised to learn that you can retrofit a backup camera if your pickup is missing one from the factory.
How, you may ask? Our experts are here to help. We’re compiling a step-by-step guide outlining the installation of a backup camera in the comfort of your driveway or garage. We cover everything from the required tools to preparation and installation, providing you with all the information necessary to install a backup camera in your ride with professional results. Read on to learn how to improve rear-facing visibility in your pickup.
Selecting the Right Backup Camera
Before getting into step-by-step instructions, it’s essential to touch on the various styles of backup cameras on the market, as each carries unique features, benefits, and installation procedures.
Display Styles
Before installing a reverse camera, consider your desired method of displaying the camera’s image; you can’t have a reverse camera without a screen to watch.
Head Unit
One of the most popular backup camera styles utilizes your vehicle’s aftermarket multimedia head unit to display the camera’s image. This method requires running your camera’s video cable to the appropriate AV jack at the rear of the stereo, thus feeding the image directly to your stereo’s monitor. This method is often preferred as it most accurately mimics the functionality of an OE backup camera; however, it does require an aftermarket stereo.
External Monitor
If you’d like to retain your truck’s factory stereo, there are a few other options. The first of which is a conventional external monitor setup. These kits utilize an aftermarket monitor mounted somewhere in view of the driver, likely the dashboard. Rather than the backup camera's video signal displaying on the stereo, it instead runs to the monitor. These kits, while maintaining your vehicle’s factory stereo, typically require you to modify your truck’s wiring and drill mounting holes into the dashboard.
Rearview Mirror
One of the most popular backup monitor designs in recent years is the rearview reverse camera, utilizing a rearview mirror-shaped monitor with a mirror-like coating. The monitor is either attached to or installed in place of the existing rearview mirror. When powered off, the display functions as a standard mirror; however, when you shift your pickup into reverse, the display illuminates, revealing an image from the rear-mounted camera.
These kits are increasingly popular due to retaining your vehicle’s factory stereo and preventing excess modifications; however, it may be necessary to disassemble the interior to route power and video cables.
Camera Mounting Styles
Like monitors, there are several ways to mount your vehicle’s reverse camera. Let’s take a look at the most common mounting positions.
License Plate
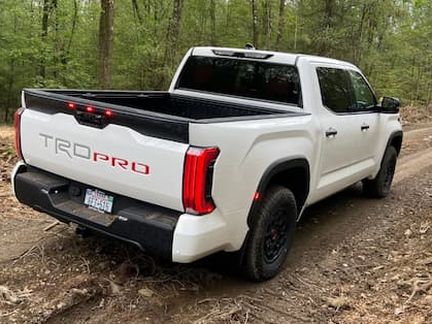
One of the easiest and quickest locations to mount an aftermarket reverse camera is a license plate mount, utilizing the top two holes of your vehicle’s license plate to secure the camera’s mounting bracket. This mounting style positions the camera close to your truck’s chassis and frame where you’ll eventually route the video cable. It also provides an excellent view of your hitch, making connecting a trailer a breeze.
Third Brake Light
Third brake light cameras are another popular mounting solution, often forgoing the typical chassis wiring in favor of routing wires through the cab beneath the interior trim panels. These cameras provide an excellent aerial view of your bed’s cargo and the rear of your pickup.
Tailgate
Tailgate camera mounts come in two forms: emblem and handle. Typically, emblem cameras are reserved for Ford products, while tailgate handle mounts are available for numerous applications. This mounting position offers the best qualities of third brake light and license plate-mounted cameras, providing a higher vantage point than conventional license plate mounts while closing the distance between a third brake light mount and the rear of your pickup.
What Tools are Required?
Installing a backup camera requires several tools and supplies for a professional-grade installation. These include:
SAE and Metric sockets
⅜” or ½” ratchet
SAE and Metric open-end wrenches
Philips and Flathead screwdrivers
Trim removal tools
Wire cutters/strippers
Plastic cable ties
T-tap or tap-splice connectors
Crimp connectors
Flush-cut pliers
Razor blade/boxcutter
How Long Does it Take to Install a Backup Camera?
While every backup camera installation varies depending on the application, display style, and camera mounting location, installing a backup camera is relatively time-consuming and labor-intensive. As a result, it’s best to set aside at least a full day for disassembly, installation, reassembly, and potential problem-solving.
Installing a Backup Camera: A Step-by-Step Guide
Now that you’ve determined your ideal monitor style and mounting locations and gathered your tools, it’s time to begin the fun part: installing that backup camera.
Do Your Research: Before tackling any project, especially one requiring wiring between the interior and exterior of your vehicle and interior disassembly, it’s essential to do some research. Browse vehicle-specific forums, vehicle audio/video sites, and other utilities for any tips and tricks that may relate to your particular make and model.
Purchase the Required Components: At RealTruck, we offer all of the top reverse cameras and components. Before beginning the installation, verify that you have everything necessary to complete the installation, including camera cables of the appropriate length, a rearview camera, and a compatible monitor. In most cases, you can purchase complete kits, including everything necessary for installation.
Disconnect the Battery: Before any disassembly or wiring, it’s always important to disconnect the negative terminal of your vehicle’s battery. This simple step helps to prevent damage to your pickup’s electrical system.
Run Your Video Cable: Arguably the most labor-intensive aspect of installing a backup camera is cable routing and management. Most wiring harnesses feature a combination video/trigger cable that supplies a reverse signal/camera output to the monitor. This step requires you to physically run the video cable/trigger wire from the camera to the monitor in the cab. While in some cases–as with a third brake light-mounted camera–this step will take place inside the cab, most applications require you to route the video/trigger cable underneath your truck along the frame.
a) From Camera to Engine Compartment
Starting at the rear of the vehicle, leave enough slack at the end of the cable to account for mounting provisions. Pick your desired path and begin routing the primary video/trigger cable beneath the chassis, utilizing the nylon cable ties (zip ties) to secure the wire approximately every 12 inches. During this step, be mindful of moving parts or hot components, such as drivelines, suspension, and exhaust pipes. A helpful guide is to observe the path of the factory wiring harnesses; mimic these lines to the best of your ability, as manufacturers chose these locations to reduce the risk of damage.
b) From Engine Compartment to Monitor
Once you’ve reached the engine compartment of your pickup, locate an entry point in the firewall. Often, an existing grommet is your best option, especially those already used to insulate wires traveling through the firewall. If the grommet has room, snake the wire through the hole and into the cab; a metal wire may be helpful during this time. However, if the grommet is too tight, you may need to cut a small entry hole or slit with your razor blade. Use extreme caution whenever you're using a blade, being mindful not to cut into the existing wires.
Once you’ve passed the wire through the firewall, locate it on the interior side beneath the dashboard and route it through the interior to the monitor’s desired location. Some disassembly of interior trim may be required, ensuring a clean installation.
Mount Your Camera: At this time, move to the rear of your truck and follow the manufacturer’s instructions to mount the reverse camera. Whether located on the third brake light, license plate, or tailgate, take your time and use caution to ensure a professional result.
Connect Your Camera’s Power and Ground Wires: When do you want your reverse camera to activate? Would you like it to receive power at all times or only when you shift into reverse? Your answer to these questions dictates the next step; however, most choose the latter.
a) Full-Time
With full-time power to a reverse camera, you can use your monitor’s dedicated camera button to display the reverse image at any time while the vehicle is on, whether driving, reversing, or parked. To accomplish this step, isolate the camera's power sub-harness. Connect the included power wire (usually red) to a switched power source (a 12V power source that’s always hot when your truck is powered on but not when your truck is off). The best location to pull power from at the rear of your truck is a 4 or 7-pin trailer connector.
Isolate the 12V switched power source and use a T-tap or tap-splice connector to connect the camera's power wire to the power source. Then, connect the camera’s ground wire (black) to the chassis or an existing ground wire using another splice connector. Now the camera will always receive power with your truck on.
b) Reverse Activated
This method is the most common means of connecting your rear camera, resulting in the camera only receiving power when your truck is in reverse. With this method, the same red wire we’d previously connected to a 12V switched source now gets connected to a reverse signal, usually the power wire for your vehicle’s reverse bulb in the tail light. Using another T-tap or tap-splice connector, connect the camera’s power wire to the hot wire of the reverse bulb. Then, connect the camera’s ground wire (black) to the chassis or an existing ground wire. Now the camera will only receive power when your truck is in reverse.
Connect Your Camera Trigger Wire (Optional): Note: This step automatically activates the monitor when you shift your vehicle into reserve; while entirely optional, it’s highly recommended. Most reverse camera wiring harnesses include an additional red wire integrated into the camera’s video cable; this is the trigger wire, used to notify the monitor whenever your vehicle shifts into reverse. Connect the camera end of the wire to the same reverse signal we used in the previous step (positive wire of the tail light harness) using another T-tap or tap-splice connector. With this step complete, we can move back into your vehicle's cab.
Mount Your Monitor: In this step, mount your monitor in an ideal location in your pickup. If using a rearview monitor, affix it to or replace the factory mirror. If using an external monitor, solidly mount it in a readily visible position. If using an aftermarket head unit, ensure it’s mounted solidly in the factory location.
Power the Monitor: If you’re using an aftermarket head unit, the stereo's wiring harness already takes care of this step. However, rearview monitors and external monitors require a switched 12V power source. Follow your individual vehicle’s wiring diagrams; however, a good rule of thumb is to tap into either a cigarette lighter (if equipped) or a 12V power outlet using a T-tap or tap-splice connector. Then, connect the monitor’s ground wire to exposed metal on the chassis or an existing ground wire, thus completing the circuit.
Connect your Trigger and Video Wires Your Monitor’s Inputs: Now that our monitor and camera are mounted, your camera has power, the trigger wire is connected to a reverse signal, and the video cable is in the cab, it’s time to make everything communicate. In this step, connect the yellow video cable from your camera’s wiring harness to your monitor's video input. Then, connect the trigger wire to your monitor's reverse signal input using a crimp connector or another suitable method. With this step completed, tuck any exposed wires, reassemble all interior pieces, and hook up the battery.
Test Out Your New Camera: Now it’s time to reap the benefits of your hard work. Turn on your truck, shift into reverse, and follow the prompts on your monitor. Your camera’s image will display on the monitor if all steps were completed correctly.
Shop Now
RealTruck is your home for the best products to outfit your build for unforgettable adventures.
See More Guide Articles Here...


- …
Join over 2 million RealTruck people
Get exclusive savings, insider information, and the latest RealTruck articles sent straight to your inbox.