The Full Guide to Lifting Your Truck
Updated on Aug 29, 2023

Looking to install a lift on your ride but unaware of the required tools and know-how? Our experts at RealTruck have compiled a list of everything you need to know before tackling a lift install yourself, including kit selection, required supplies, estimated timelines, and a step-by-step guide.
Selecting the Right Lift Kit
The first step to lifting any vehicle is selecting which kit you want to install. This decision requires multiple considerations to ensure you're satisfied with the result. For this article, we'll stick to leveling kits, suspension lift kits, and body lift kits.
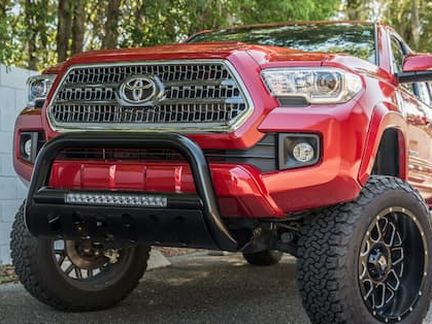
Leveling kits are designed to raise the front of your vehicle, eliminate the unattractive factory rake, and level out the ride height. With these kits, manufacturers utilize aftermarket spindles, shock/strut/coil spacers, or adjustable lift struts to raise the front end by anywhere from 1.5-3". Leveling kits are traditionally the simplest to install out of the three styles.
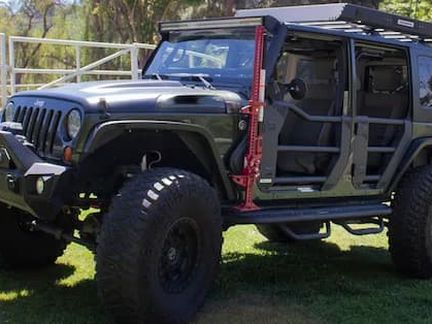
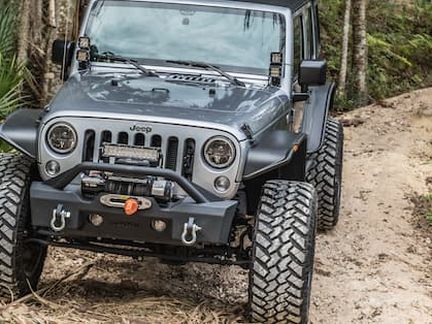
Suspension lift kits use the previously mentioned components and various drop brackets, including differential drops, sway bar drops, and cross member drops, etc. These lifts utilize blocks, spacers, add-a-leafs, or new leaf packs to raise the rear suspension in conjunction with the front. Ultimately, suspension lifts provide 3+ inches of lift at all four corners for increased ground and tire clearance. Suspension lifts rank as the most complex and time-consuming of the three styles.
Body lift kits differ from both of the previous styles of lift. As opposed to modifying the suspension, body lifts consist of alloy or composite spacers installed in place of the factory body mounts. These lift kits raise the vehicle's body approximately 2-3" above the frame, providing clearance for oversized wheels and tires.
Body lifts are designed primarily for aesthetics and fitting larger tires rather than offroad use, considering the suspension retains its OEM geometry and travel. However, ride quality is also unaffected, unlike conventional suspension lifts. Installing a body lift traditionally ranks mid-level difficulty between leveling kits and suspension lifts.
What Tools Are Required?
All lift kits require the same essential tools for installation, with some specialty tools making the job easier. For this reason, we include this list of must-haves and some optional products to make the job easier.
Must-Haves
You'll likely need these items when installing any lift kit, regardless of style or vehicle.
Metric and Standard (SAE) wrench sets
Metric and Standard (SAE) socket sets
½" drive ratchet w/ various extensions & swivels
Adjustable (crescent) wrench
½" drive torque wrench
Vice grip pliers
Channel-lock pliers
Flat head screwdriver
½" breaker bar
Floor jack & jack stands
Vehicle/Lift-Specific
These items may be required depending on the lift style and your vehicle's suspension.
Ball-joint separator tool
Coil spring compressors
C-clamps
Power drill and drill bits
Welder
Grinder and cut-off wheel
Optional
Though not required, these items are an excellent addition to the tools listed above.
Metric and Standard (SAE) impact sockets
Battery-powered/pneumatic impact driver
Battery-powered/pneumatic ½" ratchet
How Long Does it Take to Lift a Truck?
Installing a lift kit takes time and patience, whether you're a certified mechanic or a DIY-er. Several variables affect the time limit, such as your experience, the style of lift you're installing, and your access to power tools, pneumatic tools, and lifts.
As a rule of thumb, body lifts and leveling kits take a certified mechanic 1.5-3 hours to install, while suspension lifts typically take 5-15 hours, depending on the amount of drilling, welding, grinding, and cutting that must take place. For DIY-ers, plan to at least double the installation times of professionals.
Lifting a Truck: A Step-by-Step Guide
Now that we have a baseline of the time and tools required to install a lift, let's dive into the meat of the article: installing the lift. While all installs are different, these basic rules pertain to most lift kits and chassis.
Do Your Homework
The best way to ensure your lift kit installation goes smoothly is to do your homework, reducing the risk of being blindsided by any steps in the instructions. Read through the instructions numerous times before attempting to install the kit; if you can find a helpful installation video online, all the better!
Prep Your Workspace
What's the next step? You guessed it–more prep work! In the days before installation, verify you have a clean workspace and that all of your required tools are located and operating correctly. There's no worse frustration than leaving in the middle of a project to buy tools or borrow something from a buddy.
Disconnect the Negative Battery Terminal
Before working on your vehicle, it's best to disconnect the negative battery terminal to prevent damage to sensors and other electrical components during disassembly.
Note: The following steps are required for leveling kits and suspension lifts; if installing a body lift, skip to "Disassembly."
Elevate Your Vehicle
On the day of the installation, the first step is to elevate your vehicle. Ensure you're parked on solid, level ground, raise the vehicle with a lift or a floor jack, and install jack stands beneath areas of the frame where weight is evenly distributed.
Note: If you're working without an impact, loosen the lug nuts a half turn while the tires are still on the ground.
Remove Wheels and Tires
The next step is removing the wheels and tires. For leveling kits, traditionally, only the front wheels and tires are required for removal; for suspension lifts, remove all four.
Disassembly
Follow the instructions of your lift to disassemble your vehicle's suspension as required. Take your time and use caution during this step to prevent injury or damage to suspension components.
Modification
In some cases, manufacturers will specify modifications you must perform for installation. These may include cutting, trimming, welding, and drilling holes into frame sections and suspension brackets. During this step, use proper eye and skin protection.
Assembly
Follow the instructions of your lift to assemble your vehicle's suspension, using whichever combination of new and old components is specified. Make sure to torque bolts to their specified values. Once assembled, bolt the wheels and tires back onto your vehicle, torque lug nuts to spec, lower the vehicle to the ground, and reconnect the negative battery terminal.
Get an Alignment
As with any suspension modification, it's critical to have your vehicle aligned to prevent undesirable driving characteristics and uneven tire wear. Before doing any extensive driving, schedule an appointment with a trusted alignment shop.
Retorque Your Suspension Components
It's not uncommon for nuts and bolts to loosen as components shift and settle. For this reason, it's essential to retorque all mechanical components after approximately 3,000 to 5,000 miles.
Enjoy Your Ride!
After following this guide, pat yourself on the back! You've just successfully installed a lift kit on your truck. Enjoy your ride's new-found stance and ground clearance, and don't forget to check out RealTruck for all your truck needs, like a new set of wheels and tires to fill out those fenders!
Shop Now
RealTruck is your home for the best products to outfit your build for unforgettable adventures.
See More Guide Articles Here...

- …
Join over 2 million RealTruck people
Get exclusive savings, insider information, and the latest RealTruck articles sent straight to your inbox.